Setting up custom player models can significantly enhance the gaming experience on your server. FastDL (Fast Download) is an essential tool that allows players to quickly download custom content such as player models. In this blog post, we’ll walk you through the steps to add player models to FastDL.
Step 1: Prepare Your Player Models
Before adding player models to FastDL, ensure they are correctly formatted and contain the necessary files. Typically, player models come in a compressed folder containing:
- Model Files: These usually have .mdl, .dx80.vtx, .dx90.vtx, .sw.vtx, and .phy extensions.
- Texture Files: These are often .vtf and .vmt files.
- Sound Files (Optional): These include .wav or .mp3 files if the model has custom sounds.
Organize these files in a folder structure that mirrors your game’s directory structure.
Also Read: How to Set Up FastDL from VPS
Step 2: Upload Files to Your Game Server
- Connect to Your Game Server: Use an FTP client (like FileZilla) to connect to your game server.
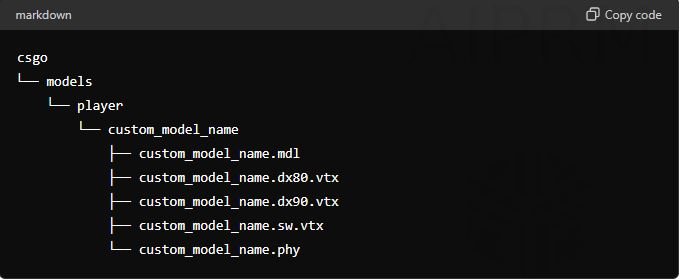
- Navigate to the Models Directory: Typically found in
csgo/modelsfor Counter-Strike: Global Offensive ortf/modelsfor Team Fortress 2. - Upload the Player Model Files: Ensure the folder structure matches the one on your local machine. For example:
Step 3: Upload Files to Your FastDL Server
- Connect to Your FastDL Server: Use an FTP client to connect to your FastDL server.
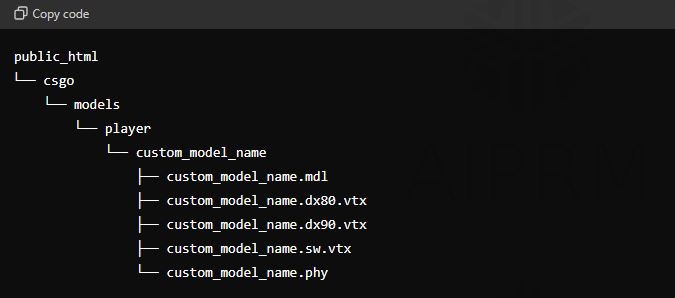
- Mirror the Game Server Directory Structure: Ensure the directory structure on your FastDL server mirrors that of your game server.
- Upload the Player Model Files: Place the files in the corresponding directories. For example:
Step 4: Configure the FastDL Settings
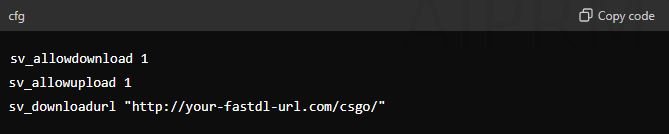
- Open the Server Configuration File: Typically
server.cfglocated in thecsgo/cfgortf/cfgdirectory. - Add FastDL Configuration:
Step 5: Test the Setup
- Restart Your Game Server: Apply the new settings.
- Join Your Server: Check if the player model downloads correctly.
- Verify the Files: Ensure all necessary files are downloaded and the player model works in-game.
Troubleshooting Tips
- File Permissions: Ensure all files on the FastDL server have the correct permissions for public access.
- Directory Structure: Double-check that the directory structure on both the game server and FastDL server matches exactly.
- FastDL URL: Ensure the URL in the
server.cfgis correct and accessible.
By following these steps, you should be able to successfully add custom player models to your game server using FastDL. This will not only enhance the gaming experience but also give your server a unique touch. Happy gaming!

Daniel J. Morgan is the founder of Invidiata Magazine, a premier publication showcasing luxury living, arts, and culture. With a passion for excellence, Daniel has established the magazine as a beacon of sophistication and refinement, captivating discerning audiences worldwide.