
Every website we visit has unique IP addresses. Imagine a situation where you must memorize every website’s IP address to access it; wouldn’t it be a nightmare?
To solve this issue, engineers designed a DNS or Domain Name Server that works like an internet phonebook. DNS automatically translates IP addresses into domain names.
For example, when you enter a domain name (e.g., www.google.com), your device contacts a DNS server to get the domain’s unique IP address.
After the server responds, the IP address is translated into domain names and served on your browser. The process is known as DNS resolution or DNS lookup.
What Is a DNS Leak?
A DNS leak is a security vulnerability that can expose a user’s DNS queries to the Internet Service Provider (ISP) and potentially third parties, such as hackers and snoopers. This leak allows your ISP and third parties to eavesdrop on which website you are visiting because all the DNS queries are directly sent to the ISP’s DNS server.
One of the effective ways to prevent DNS leaks is using a secure VPN service.
There are potential symptoms of DNS leak, such as:
- You’re facing a slower internet connection.
- Your IP is revealed despite being connected to a VPN.
- Your DNS queries are sent to your ISP, leaking your IP.
- You may face difficulties accessing some websites.
How to Fix DNS Leak?
There are multiple ways to fix a DNS leak, but remember that you cannot fix a DNS leak entirely by yourself. Here are some practical ways to fix a DNS leak.
Choose a VPN With DNS Leak Protection
Not all the VPNs offer robust DNS leak protection, specifically the free ones. Even though they promise you that your DNS queries will be protected, they don’t work as advertised. So what to do? Simple, you don’t have to trust a VPN provider.
Test whether your VPN is protecting your DNS queries or not. Follow the below steps:
- Go to https://www.dnsleaktest.com/ and click on standard test.
- Wait for a moment; it will test the DNS queries for you.
The test result will show something like this:
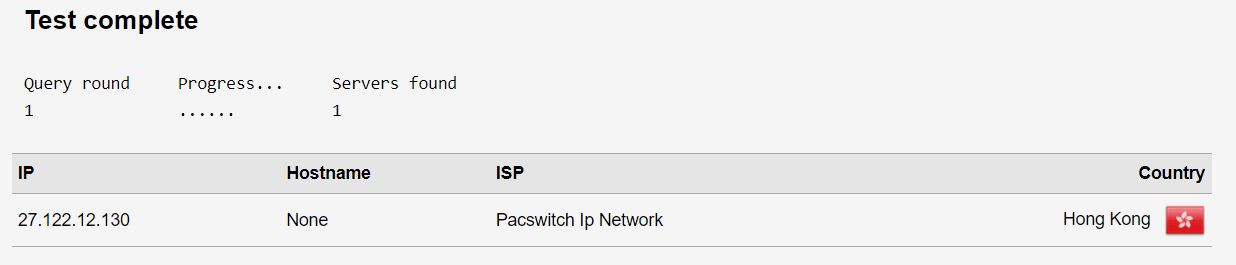
DNS Leak Test Result Showing No Leaks
For this test, we connected to a Hong Kong server and performed a DNS leak test. As the result shows, the DNS queries are encrypted, and our original IP has no leak.
If you have a DNS leak, the result would show something like this:
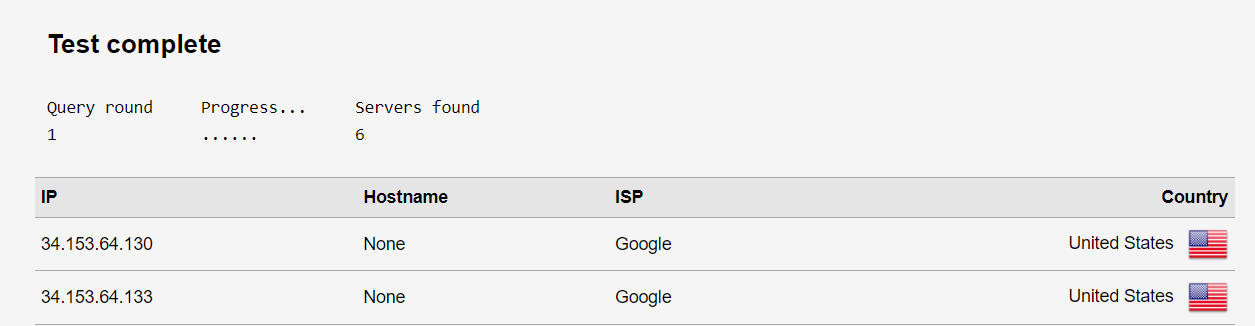
This result shows that all the requests are passing through the original IP address of our ISP rather than our VPN connection to Hong Kong. That’s a clear DNS leak!
So, ensure you use a VPN that offers robust DNS leak protection. You can always test it to see whether it’s working perfectly.
Flush your DNS Cache Occasionally
Flushing your DNS can help to solve the DNS leak problem. To flush the DNS cache, follow the below steps accordingly:
- Open CMD on your Windows device.
- Type the command ipconfig /flushdns and hit enter.
- You can use a manual DNS or Google’s 8.8.8.8 public DNS.
We recommend using Next DNS, one of the best and most highly customizable public DNS services, available both as a free or paid option.
Verify that Your VPN Works Correctly
The VPN you’re connected to should work correctly by hiding your IP address and protecting your DNS queries. Avoid using free or cheap VPNs that don’t have DNS leak protection by default, potentially exposing you to data leaks.
You can check whether your VPN protects your IP address by visiting websites like Check My IP Address or What is My IP Address. VPN applications support all major devices such as Android, iOS, MacOS, Windows, etc.
Ensure your VPN Has a Kill Switch.
Kill switch prevents IP leaks when a connection drop occurs. It disconnects you from the internet until the VPN connection is restored. Once the internet is back, it reconnects you to the VPN to secure your internet connection. So, ensure you use a VPN that supports an active kill switch to prevent IP leaks and maximize protection.
How to Prevent DNS Leak?
A secure VPN that protects your DNS queries is the best way to prevent DNS leaks. However, you can also configure your own DNS manually if you prefer.
As we mentioned, many popular third-party DNS providers are available. Such as,
- Cloudflare 1.1.1.1 DNS
- Google’s Public DNS
- Uncensored DNS
- Control-D
- Open DNS
- Next DNS
- Quad9
They all offer free public DNS; explore and select the one that suits your preference. Using a third-party DNS gives you control over your internet browsing. You can customize the DNS according to your browsing preferences.
For example, you can block ads and trackers, control which sites you visit on your network, block certain sites, such as adult sites, and unblock any content.
Wrapping Up
A DNS leak is a dangerous security fault that can expose you online and compromise your identity. Ensure you use a secure VPN with strong encryption to prevent DNS leaks and hide your IP address. Moreover, to prevent DNS leaks, go through the security measures we mentioned in our content. Happy browsing!

Daniel J. Morgan is the founder of Invidiata Magazine, a premier publication showcasing luxury living, arts, and culture. With a passion for excellence, Daniel has established the magazine as a beacon of sophistication and refinement, captivating discerning audiences worldwide.