

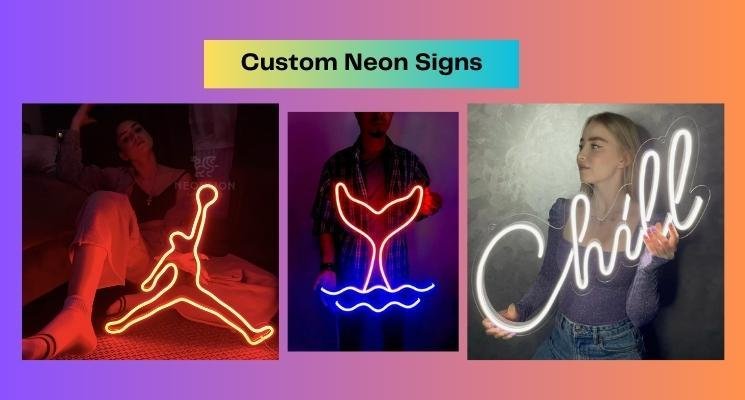
Modern LED custom neon signs have completely changed how people decorate homes and commercial storefronts, offering a vibrant alternative to fragile glass tubes. Installing these lightweight glowing displays requires understanding how flexible silicone neon tubing is mounted onto clear acrylic backings. Whether you purchased a cut-to-shape acrylic board or a whole rectangular back panel, mounting custom neon signs properly ensures both aesthetic balance and electrical safety. With the right hardware, a steady hand, and basic tools, any beginner can transform a blank wall into a striking visual centerpiece.
Understanding Acrylic Backing Styles and Sign Construction
Different acrylic backing configurations dictate how custom neon signs distribute weight and attach to your wall.
Before you touch a drill to your wall, examine the physical construction of your LED neon fixture. Most manufacturers mount flexible LED tubing onto transparent acrylic panels cut in one of three primary styles: contour cut-to-shape, hollowed out around the letters, or mounted on a solid rectangular board. Cut-to-shape boards provide a minimalist look with hidden edges, but they require precise alignment because their pre-drilled mounting holes follow the irregular contours of the lettering. Whole rectangular boards distribute weight more evenly and often feature symmetrical corner holes that make measuring and leveling significantly easier for beginners.
Preparing Essential Tools and 12V Power Hardware
Gathering your drill bits, spirit level, and power supply components beforehand prevents frustrating interruptions mid-installation.
A successful hanging process relies entirely on having the correct equipment ready before you begin working on your wall surface. Unpack your custom neon signs and lay out all components, including the 12V power supply adapter brick, the wireless dimmer or remote control unit, and the stainless steel stand-off mounting hardware kit. You will also need a power drill with appropriate masonry or drywall bits, plastic wall anchors, a pencil for marking hole locations, a Phillips-head screwdriver, and a reliable spirit level. For those interested in broader household fixture mounting standards, you can review professional home appliance setup practices for additional structural insights.
Mapping Wall Layout and Power Outlet Proximity
Evaluating viewing angles and cord reach before marking your wall prevents awkward wire stretches and crooked placements.
The visual success of custom neon signs depends heavily on placing them at the correct height and ensuring the low-voltage transparent cord can easily reach a wall socket. Hold your sign against the wall with the help of a second person, stepping back to check whether the display sits comfortably at eye level relative to surrounding furniture. Pay close attention to the exact point where the power wire exits the acrylic backing, as this determines which direction the cord will hang. Use a pencil to lightly mark through the pre-drilled acrylic holes onto the wall, and double-check your pencil marks with a spirit level to guarantee a straight installation.
Executing Wall Anchors and Stand-Off Hardware Mounting
Drilling secure pilot holes and installing threaded stand-off barrels provides a professional floating display effect.
Once your layout marks are level, use your power drill to create pilot holes matched to the size of your plastic wall anchors. Gently tap the wall anchors into the drywall until they sit completely flush with the surface, or use heavy-duty masonry anchors if you are mounting into brick. Screw the base barrels of your stainless steel stand-off hardware firmly into these anchors until they feel completely rigid. Next, place the acrylic backing over the protruding barrels, insert the mounting screws through the front of the acrylic, and tighten them down gently so the board is held securely without cracking the plastic.
Managing Low-Voltage Transformers and Dimmer Controls
Connecting your power adapter and integrating inline dimmers ensures safe, customizable brightness for your display.
Electrical connection is the final step in getting custom neon signs to glow safely and brightly in your room. Plug the thin transparent cord from your sign directly into the output port of the 12V DC power transformer brick supplied with your kit. Then, connect the transformer cord into a standard household electrical outlet or surge protector. Most modern LED neon packages include an inline dimmer switch or a wireless radio-frequency remote control, allowing you to adjust light intensity or activate flashing modes. Secure any excess hanging cord cleanly along the baseboard using adhesive cable clips to maintain a polished look.
Frequently Asked Questions
Can I install custom neon signs on rental walls without drilling holes?
Yes, lightweight custom neon signs can be hung using heavy-duty adhesive mounting strips or hanging wires, provided you verify the maximum weight capacity of the adhesive.
Why do custom neon signs require a 12V power supply?
A 12V direct current transformer steps down standard household voltage to a safe level, preventing overheating and ensuring the flexible LED neon strips operate efficiently.
How do cut-to-shape acrylic boards differ from whole boards?
Cut-to-shape acrylic boards trim the plastic closely around the neon letters for a minimal aesthetic, while whole rectangular boards offer a solid background that simplifies hardware alignment.
What should I do if my neon sign flickers after plugging it in?
Flickering typically points to a loose connection between the sign’s connector plug and the power adapter brick, which can be fixed by pushing the pins together firmly.
Are custom neon signs safe to leave turned on overnight?
Because LED neon flex emits virtually no heat and operates on low voltage, these signs remain cool and safe during extended runtimes, though using a timer is recommended for energy conservation.
Can I modify the shape of my acrylic backing myself?
You should never attempt to cut or drill into the acrylic backing yourself, as stray drill bits can easily sever internal low-voltage wiring and ruin the entire sign.
Disclaimer: Installing custom neon signs involves working with wall materials and low-voltage electrical components. Hardware requirements and manufacturer specifications can vary by product. Always review your specific instruction manual and verify wall stability before beginning your installation. Furthermore, for homeowners updating multiple interior features, reviewing professional home appliance setup practices offers additional guidance on securing heavy fixtures safely.


