

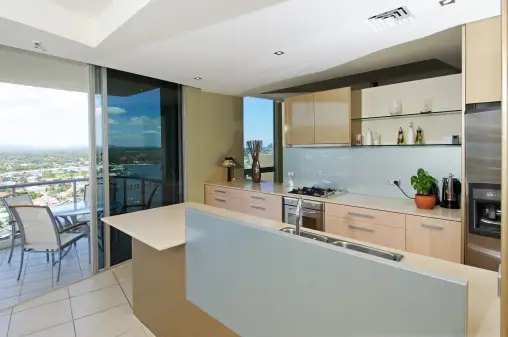
As a new homeowner tackling DIY interior upgrades for the first time, you quickly realize that protecting kitchen walls without sacrificing modern style is a major priority. One of the smartest surface choices for contemporary culinary spaces is the smooth glass kitchen wall panel. Glass splashbacks offer an exceptional blend of everyday practicality and clean visual lines, making them a favorite upgrade for modern properties.
Maximizing Natural and Artificial Light in Compact Kitchens
Glass splashbacks feature natural reflective qualities that actively brighten up rooms lacking abundant sunshine. When daylight strikes the smooth surface of glass splashbacks, it bounces around the room to eliminate dark shadows in tight preparation corners. This reflective brilliance makes even small apartment kitchens feel significantly more open and breathable.
Eliminating Grout Lines for Effortless Daily Maintenance
Glass splashbacks require minimal upkeep because their continuous, seamless composition completely eliminates traditional tile grout. Traditional ceramic tiles accumulate stubborn grease splatters and food oils within porous cement lines that demand intensive scrubbing. By contrast, a simple wipe down with a damp microfiber cloth and a mild detergent keeps glass splashbacks looking spotless in seconds.
Ensuring Thermal Safety Behind Modern Cooktops
Glass splashbacks installed directly behind active burners must consist of toughened safety glass to withstand extreme thermal shifts. Standard window glass will fracture immediately under the high heat generated by gas hobs or modern induction cooktops. Properly manufactured low-iron tempered glass panels handle intense kitchen heat and steam safely without warping or discoloring.
Navigating Precision Measurement and Wall Preparation
Glass splashbacks demand meticulous wall preparation and exact factory templating before any mounting takes place. Unlike flexible tile sheets, rigid glass panels cannot be trimmed on-site once they have undergone the heat-tempering process. Installers must account for power outlet cutouts and level out any uneven plasterwork beforehand to prevent stress cracks during adhesive bonding.
Personalizing Your Interior with Custom Colors and Prints
Glass splashbacks provide endless design versatility through custom back-painting options and high-resolution digital imagery. Homeowners can select solid neutral tones that blend seamlessly into minimalist cabinetry or vibrant artistic prints that serve as a striking focal point. For property owners planning broader domestic renovations, reviewing our guide on the top 4 perfect home additions for every urban house offers great inspiration for maximizing residential space.
Frequently Asked Questions
Are glass splashbacks safe to use behind gas cooktops?
Yes, provided they are fabricated from high-grade toughened safety glass designed to withstand extreme thermal loads without cracking under direct heat.
Can glass splashbacks be installed directly over existing wall tiles?
Yes, glass splashbacks can often be fitted over old flat tiles as long as the underlying surface is structurally sound, clean, and completely level.
How do you clean and maintain glass splashbacks?
You can easily clean glass splashbacks using a standard window cleaner or a gentle mixture of warm water and dish soap applied with a soft cloth.
Do glass splashbacks require professional installation?
While experienced DIYers can install pre-measured panels, professional fitting is recommended to ensure accurate socket cutouts and safe handling of heavy glass.
Can electrical sockets be cut into glass splashbacks?
Yes, all cutouts for power switches and outlets must be precision-cut by the manufacturer prior to the glass tempering process.
Do glass splashbacks fade or discolor over time?
High-quality glass splashbacks utilize UV-stable back-paints or ceramic inks that protect the color pigment from fading under strong sunlight.
Disclaimer: Kitchen renovation requirements, material specifications, and installation methods can vary based on your specific layout and local building regulations. Always verify final measurements, adhesive compatibility, and safety standards with qualified professionals before beginning your installation.


